
Toddlers suddenly like to exercise their own independence, which can be frustrating when you’re trying to get in the car, but when it comes to process art—art that is child-driven and focuses on the process rather than the finished product—it’s amazing to watch unfold.
Experts say process art can improve a child’s focus and confidence, it can boost creativity and foster independence, as it’s the child making his or her own artistic decisions. Let your child have the reins for a moment and let them discover, explore, and have fun creating. Here are 12 process art activity ideas, most stemming from things you probably already have around the house, to get you started.
1. Paint with Yarn
Gather washable tempera paints, yarn, popsicle sticks and paper and let your kids do the rest. Pour the paint into small bowls or empty egg cartons and cut up some pieces of yarn. Dip the yarn into the paint colors and use the popsicle sticks to make sure the yarn gets covered enough. Pull out the paint-covered yarn, place it on the paper, then lift it up or drag it around. Notice the colors, shapes, and patterns that emerge and repeat.
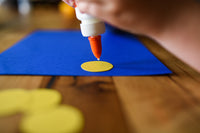
2. Create Collage Art
I love letting the kids make collages on broken-down cardboard boxes that we have around the house. Spend some time collecting materials outside, like leaves, flower petals and sticks to glue on. Have crayons and markers available for added engagement.
3. Sculpt with Clay
I used to play with clay for hours upon hours as a child. For children that aren’t interested in painting or coloring, working with clay can be just as fun. (If you don’t have clay at home, check out our recipe for homemade playdough.) Consider having plenty of tools available to let your child get creative.
4. Explore with Tinker Trays
Tinker trays are as much fun to put together as they are to explore and dig through. Tinker trays are adorable, but you can really use any container with various compartments. Simply pre-fill the compartments with different objects, like popsicle sticks, pompoms, stickers, beads, and anything else you can think of and let your child do the rest. They’ll create their own art or simply delight in just exploring.
5. Paint on Windows or Mirrors
Grab your brushes and using either washable tempera paints (mix in liquid dish soap for easier cleanup) or OOLYs Rainy Days Gel crayons, let your child create their art on a different surface. Use a wet paintbrush on OOLYs crayons to add an amazing watercolor effect. If opting for paint, you might want to put an old sheet underneath to catch splatters and drips. While we’re encouraging our children to explore and get messy, this might be wise to consider.
6. Chalk Art
All you need is sidewalk chalk and a spray bottle filled with water and let your budding Picasso’s get to work. I recently gave my kids a roll of painter’s tape to use on the driveway as well, which when placed on the ground in interesting shapes, colored in, then removed, it made a beautiful stained-glass-like collage. My 6-year old’s tip was to rub the color with her finger to make it smooth before removing the tape.
7. Prints with Food
Today, your kids don’t have to finish their fruit because you can use the apples for printmaking. With a paintbrush, just paint the flat surface of your sliced apple with paint, grab some paper, and begin stamping. Your little ones will be amazed at the colors and designs they can create. Also try the end of Romaine lettuce (tip: leave it out overnight first to dry a bit), celery stalks, bell peppers, or even a dried orange slice.
8. Shaving Cream Art
And I mean the white, foamy shaving cream. Before you begin, cut out shapes from loose cardboard, cardstock, or old cereal boxes, which will be the base for your child’s art project. With their hands, let your child cover the shapes with shaving cream, which often proves to be the most fun part. Then your child can add drops of watercolor paints (using droppers or pipettes) to the shaving cream and watch as the colors disperse.
9. Painting in Nature
I love rock painting, but only recently tried painting sticks and branches. Who knew that would be so fun?! Using tempera paints, you can set up one big station with paint jars and brushes all around and let your children do the rest. For a bit more artistic flare, grab some Elmer’s glue, pompoms, beads, and any other small craft supplies you might have that could be glued on. Don’t forget to put some newspaper under the branch for drips.
10. Seashell Painting
We love collecting shells at the beach, but then what? Painting seashells is a fun and creative activity, plus you’ll spend extra time remembering the fun you had on vacation and identifying the different types of shells. Just grab your paints, a few brushes, and lay out the shells on a covered surface. As a next step, you could then make jewelry out of a shell with some string and beads or glue them onto a picture frame or collage.
11. Painting with Nature
Different from my earlier idea, this time swap out paint brushes for flowers, leaves and feathers. Try making your own paintbrushes with a stick, a rubber band, and some grass. Dip the end into some washable paint and see what designs your little one comes up with.
12. Build a Bug
For a paint-free alternative, fill a plate or cookie sheet with pre-cut shapes of different sizes and colors. Don’t forget small circles for eyes, small rectangles for legs and antennae, but leave the decision making up to your little one. Have a larger piece of construction paper ready for the base, a glue stick, and see what kind of bugs your child can dream up.